by Eric Meier
When attempting to identify a wood sample, it’s important to keep in mind the limitations and obstacles that are present in our task. Before starting, please have a look at The Truth Behind Wood Identification to approach the task in a proper mindset; I consider the linked article to be required reading for all those visiting my site with the intent of identifying wood.
1. Confirm it is actually solid wood.
Before proceeding too much farther into the remaining steps, it’s first necessary to confirm that the material in question is actually a solid piece of wood, and not a man-made composite or piece of plastic made to imitate wood.
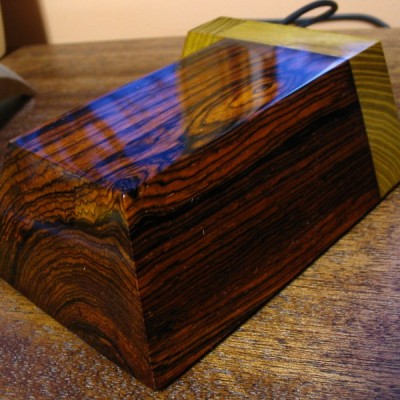
Can you see the end-grain?
Manufactured wood such as MDF, OSB, and particleboard all have a distinct look that is—in nearly all cases—easily distinguishable from the endgrain of real wood. Look for growth rings—formed by the yearly growth of a tree—which will be a dead-giveaway that the wood sample in question is a solid, genuine chunk of wood taken from a tree.
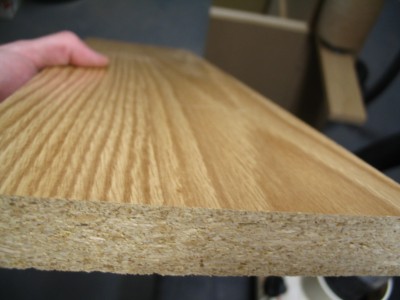
Is it veneered?
If you see a large panel that has a repeating grain pattern, it may be a veneer. In such cases, a very thin layer of real wood is peeled from a tree and attached to a substrate; sometimes the veneer can be one continuous repeating piece because it is rotary-sliced to shave off the veneer layer as the tree trunk is spun by machines. Assuming it is a real wood veneer with a distinct grain and texture—and not merely a piece of printed plastic—you may still be able to identify the outer veneer wood in question, but you should still realize that is it only a veneer and not a solid piece of wood.
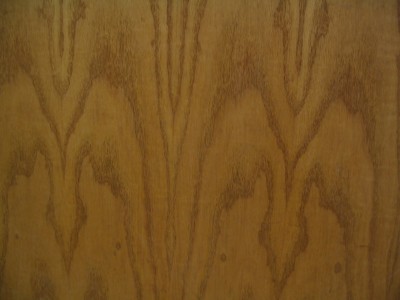
Is it painted or printed to look like wood?
Many times, especially on medium to large-sized flat panels for furniture, a piece of particleboard or MDF is either laminated with a piece of wood-colored plastic, or simply painted to look like wood grain. Many of today’s interior hardwood flooring planks are good examples of these pseudo-wood products: they are essentially a man-made material made of sawdust, glues, resins, and durable plastics.
2. Look at the color.
Some questions to immediately ask yourself:
Is the color of the wood natural, or is it stained?
If there is even a chance that the color isn’t natural, the odds are increased that the entire effort of identifying the wood will be in vain.
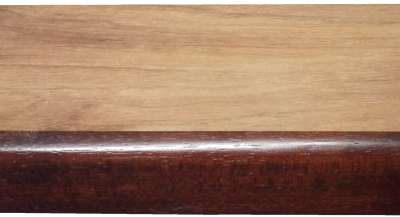
Is it weathered or have a patina?
Many woods, when left outside in the elements, tend to turn a bland gray color. Also, even interior wood also takes on a patina as it ages: some woods get darker, or redder, and some even get lighter or lose their color; but for the most part, wood tends to darken with age.
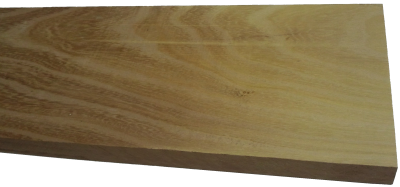
Is it possible to sand or plane the board to see the natural raw color of the wood?
The most predictable baseline to use when identifying wood is in a freshly sanded state. This eliminates the chances of a stain or natural aging skewing the color diagnosis of the wood.
3. Observe the wood grain.
If the wood is unfinished, then look at the texture of the grain. Ask yourself these questions:
Does the wood have an open, porous texture?
Most softwoods will be almost perfectly smooth with no grain indentations, while many common hardwoods have an open pore structure, such as oak or mahogany; though there are some hardwoods that are also smooth to the touch, such as maple.
Can you tell if the wood is quartersawn or plainsawn?
By observing the grain patterns, many times you can tell how the board was cut from the tree. Some wood species have dramatically different grain patterns from plainsawn to quartersawn surfaces. For instance, on their quartersawn surfaces, lacewood has large lace patterns, oak has flecks, and maple has the characteristic “butcher block” appearance.
Is there any figure or unusual characteristics, such as sapwood, curly or wild grain, burl/knots, etc.?
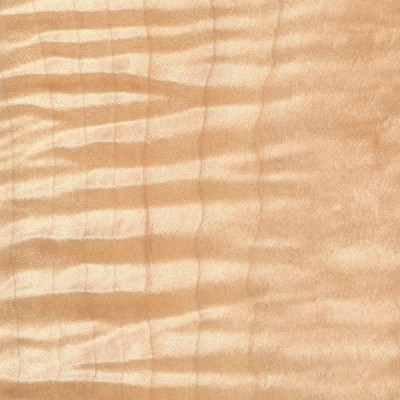
Some species of wood have figure that is much more common than in other species: for example, curly figure is fairly common in soft maple, and the curls are usually well-pronounced and close together. Yet when birch or cherry has a curly grain, it is more often much less pronounced, and the curls are spaced farther apart.
4. Consider the weight and hardness of the wood.
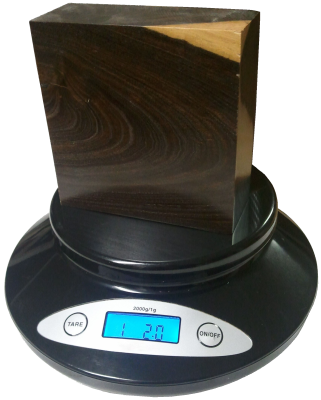
If it’s possible, pick the piece of wood up and get a sense of its weight, and compare it to other known wood species. Try gouging the edge with your fingernail to get a sense of its hardness. If you have a scale, you can take measurements of the length, width, and thickness of the wood, and combine them to find the density of the wood. This can be helpful to compare to other density readings found in the database. When examining the wood in question, compare it to other known wood species, and ask yourself these questions:
Is the wood dry?
Wood from freshly felled trees, or wood that has been stored in an extremely humid environment will have very high moisture contents. In some freshly sawn pieces, moisture could account for over half of the wood’s total weight! Likewise, wood that has been stored in extremely dry conditions of less than 25% relative humidity will most likely feel lighter than average.
How does the wood’s weight compare to other species?
Taking into account the size of the board, how does its weight compare to other benchmark woods? Is it heavier than oak? Is it lighter than pine? Look at the weight numbers for a few wood species that are close to yours, and get a ballpark estimate of its weight.
How hard is the wood?
Obviously softwoods will tend to be softer than hardwoods, but try to get a sense of how it compares to other known woods. Density and hardness are closely related, so if the wood is heavy, it will most likely be hard too. If the wood is a part of a finished item that you can’t adequately weigh, you might be able to test the hardness by gouging it in an inconspicuous area. Also, if it is used in a piece of furniture, such as a tabletop, a general idea of its hardness can be assessed by the number and depth of the gouges/dings in the piece given its age and use. A tabletop made of pine will have much deeper dents than a tabletop made of Oak. Additionally, you can always try the “fingernail test” as a rough hardness indicator: find a crisp edge of the wood, and with your fingernail try to push in as hard as you can and see if you’re able to make a dent in the wood.
5. Consider its history.
Many times we forget common sense and logic when attempting to identify wood. If you’ve got a piece of Amish furniture from Pennsylvania, chances are more likely that the wood will be made of something like black walnut or cherry, and not African wenge or jatoba. You might call it “wood profiling,” but sometimes it can pay to be a little prejudiced when it comes to wood identification. Some common-sense questions to ask yourself when trying to identify a piece of wood:
Where did it come from?
Knowing as much as you can about the source of the wood—even the smallest details—can be helpful. If the wood came from a wood pile or a lumber mill where all the pieces were from trees processed locally, then the potential species are immediately limited. If the wood came from a builder of antique furniture, or a boat-builder, or a trim carpenter: each of these occupations will tend to use certain species of woods much more often than others, making a logical guess much simpler.
How old is it?
As with the wood’s source, its age will also help in identification purposes. Not only will it help to determine if the wood should have developed a natural patina, but it will also suggest certain species which were more prevalent at different times in history. For instance, many acoustic guitars made before the 1990s have featured Brazilian rosewood backs/sides, yet due to CITES restrictions placed upon that species, East Indian rosewood became a much more common species on newer guitars. (And this is a continuing shift as newer replacements are sought for rosewoods altogether.)
How large is the piece of wood?
Some species of trees are typically very small—some are even considered shrubs—while others get quite large. For instance, if you see a large panel or section of wood that’s entirely black, chances are it’s either painted, dyed, or stained: Gaboon ebony and related species are typically very small and very expensive.
What is the wood’s intended use?
Simply knowing what the wood was intended for—when considered in conjunction with where it came from and how old it is—can give you many clues to help identify it. In some applications, certain wood species are used much more frequently than others, so that you can make an educated guess as to the species of the wood based upon the application where it was used. For instance, in the United States: many older houses with solid hardwood floors have commonly used either red oak or hard maple; many antique furniture pieces have featured quartersawn white oak; many violins have spruce tops; many closet items used aromatic red cedar, and so forth. While it’s not a 100% guarantee, “profiling” the wood in question will help reduce the number of possible suspects, and aid in deducing the correct species.
6. Find the X-Factor.
Sometimes, after all the normal characteristics of a sample have been considered, the identity of the wood in question is still not apparent. In these instances—particularly in situations where a sample has been narrowed down to only a few possible remaining choices—it’s sometimes helpful to bring in specialized tests and other narrower means of identification.
The following techniques and recommendations don’t necessarily have a wide application in initially sorting out wood species and eliminating large swaths of wood species, but will most likely be of use only as a final step in special identification circumstances.
Odor
Believe it or not, freshly machined wood can have a very identifiable scent. When your eyes and hands can’t quite get a definitive answer, sometimes your nose can. Assuming there is no stain, finish, or preservative on or in the wood, quickly sand, saw, or otherwise machine a section of the wood in question, and take a whiff of the aroma.
Although new scents can be very difficult to express in words, many times the scent of an unknown wood may be similar to other known scents. For instance, rosewoods (Dalbergia spp.) are so named for their characteristic odor that is reminiscent of roses. Although difficult to directly communicate, with enough firsthand experience scents can become a memorable and powerful means of wood identification.
Fluorescence
While certain woods can appear basically identical to one another under normal lighting conditions, when exposed to certain wavelengths—such as those found in blacklights—the wood will absorb and emit light in a different (visible) wavelength. This phenomenon is known as fluorescence, and certain woods can be distinguished by the presence or absence of their fluorescent qualities. See the article Fluorescence: A Secret Weapon in Wood Identification for more information.
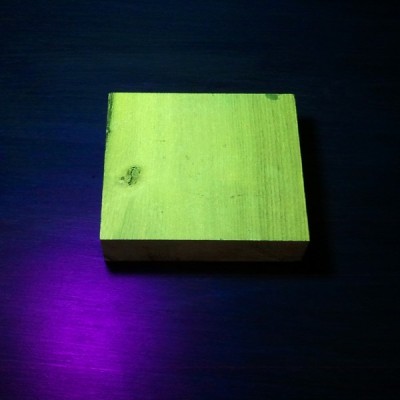
Chemical Testing
There are only a small number of chemical tests regularly used on wood, most of which are very specialized and were developed to help distinguish easily confused species with one another. They work by detecting differences in the composition of heartwood extractives. A chemical substance (called a reagent) is usually dissolved in water and applied to the wood surface: the surface is then observed for any type of chemical reaction (and accompanying color change) that may occur. Two of the most useful are the tests that are meant to separate Red and White Oak, and Red and Hard Maple.
Heartwood Extractives Leachability
Sometimes a wood species will have heartwood extractives that will be readily leachable in water and capable of conspicuously tinting a solution of water a specific color. For instance, the heartwood extractives contained in osage orange (Maclura pomifera) contain a yellowish-brown dye that is soluble in water. (This can sometimes be observed anecdotally when the wood is glued with a water-based adhesive: the glue’s squeeze-out is an unusually vibrant yellow.)
In a simple water extract color test, wood shavings are mixed with water in a vial, test tube, or other suitably small container, and the color of the water is observed after a few minutes. If the heartwood extractives are leachable by water, then a corresponding color change should quickly occur.
In addition to osage orange (Maclura pomifera), merbau (Intsia spp.), and rengas (Gluta spp. and Melanorrhoea spp.) are also noted for their readily leachable heartwood extractives. Because this property is quite uncommon, it can serve to quickly differentiate these woods from other lookalikes.
7. Look at the endgrain.
Perhaps no other technique for accurate identification of wood is as helpful and conclusive as the magnified examination of the endgrain. Frequently, it brings the identification process from a mostly intuitive, unscientific process into a predictable, repeatable, and reliable procedure.
Looking at the endgrain with a magnifier shouldn’t be a mystifying or esoteric art. In many cases, it’s nearly as simple as examining small newsprint under a magnifying glass. There are three components necessary to reap the full benefits contained in the endgrain:
I. A prepared surface.
When working with wood in most capacities, it becomes quickly apparent that endgrain surfaces are not nearly as cooperative or as easily worked as face grain surfaces. However, in this case, it is absolutely critical that a clear and refined endgrain surface is obtained.
For a quick glance of a softwood sample, a very sharp knife or razor blade can be used to take a fresh slice from the endgrain. However, in many denser species, especially in tropical hardwoods, one of the best ways to obtain a clear endgrain view is through diligent sanding. It’s usually best to begin with a relatively smooth saw cut (as from a fine-toothed miter saw blade) and proceed through the grits, starting at around 100, and working up to at least 220 or 320 grit, preferably higher for the cleanest view.
II. The right magnifier.
It need not be expensive, but whatever tool is used to view the endgrain should have adequate magnifying power. In most instances, 10x magnification is ideal, however, anything within the range of 8 to 15x magnification should be suitable for endgrain viewing. (Standard magnifying glasses are typically in the range of 2 to 4x magnification.)
These stronger magnifiers, sometimes called loupes, usually have a smaller viewing area than standard magnifying glasses. Fancier models—with built in lights, or larger viewing surfaces—are available at a premium; but the most basic models are usually only a few dollars.
III. A trained eye.
The third element that constitutes a proper endgrain examination is simply knowing what to look for. In analyzing the patterns, colors, shapes, and spacing of the various anatomical features, there is a veritable storehouse of information within the endgrain—all waiting to be unlocked. Yet, if these elements have not been pointed out and learned, the array of features will simply seem like an unintelligible jumble. The discipline of recognizing anatomical endgrain features is not easily summed up in a few sentences or even a few paragraphs, but it is nonetheless critical to the identification process. To this end, an in-depth look should be given to the various categories, divisions, and elements that constitute endgrain wood identification on the macroscopic level. (In this regard, macroscopic denotes what can be seen with a low-powered, 10x hand lens—without the aid of a microscope—rather than simply what can be seen with the naked eye.) Because the anatomy between softwoods and hardwoods is so divergent, each will be considered and examined separately:Still stumped?
If you have a mysterious piece of wood that you’d like identified, you’ve got a few options for next steps:USDA’s Forest Products Laboratory
You can mail your physical wood samples to the Center for Wood Anatomy Research.
Pros:
- Free
- Professional wood identification
Cons:
- Only available to US citizens
- Slow turnaround times (up to a month or more)
- Limited to three IDs per year
See their Wood ID Factsheet for more info.
Alden Identification Service
You can mail your physical wood samples (even small sections taken from antiques) to Alden Identification Service.
Pros:
- Professional wood identification
- Faster turnaround times (ranging from a few days to a week or two)
Cons:
- Paid service
See their ordering page for more info. (Note that Harry Alden has written several books while at USDA, including both Hardwoods and Softwoods of North America.)
Ask for help online
If the wood ID is merely a curiosity, or non-critical, you can post pictures of the wood in question.
Pros:
- Free
- No need to send physical samples
Cons:
- Greatly limited by the quality of the pictures provided
- Extra work usually required to get adequate clarity in photos
See article of Common US Hardwoods to help find the most commonly used woods.
Get the hard copy
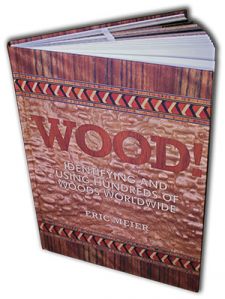 If you’re interested in getting all that makes The Wood Database unique distilled into a single, real-world resource, there’s the book that’s based on the website—the Amazon.com best-seller, WOOD! Identifying and Using Hundreds of Woods Worldwide. It contains many of the most popular articles found on this website, as well as hundreds of wood profiles—laid out with the same clarity and convenience of the website—packaged in a shop-friendly hardcover book.


Why I will no longer be replying to every wood ID request I’ve replied to literally thousands of wood ID requests on this site over the past 13+ years, but as the site’s popularity has grown, so has the time demands for ID on a daily basis. (Contrary to what some may seem to think, I am not some all-knowing wood wizard that can instantly ID your wood. It can actually take me a long time to sift through a lot of different resources.) Over the past few years, my backlog of pending wood species to be added to the… Read more »
Can anyone tell me what kind of wood this is by the pictures. It is very heavy and solid. It is made into a lamp very vintage I believe!
Can anyone help me confirm this wood type of this chair? Based on my reading here I think it would be a maple, but the fact that the rays seem to be evenly distributed both horizontally and vertically makes me unsure. I’m in Australia, but I know we import a lot of US timber.
Almost definitely rubberwood
I brought this duck at a thrift store and would love to know what type of wood this is. It is very heavy.
Hello, I bought this wood table from an antiques dealer who believed it to be teak but wasn’t sure. I’m not sure about any finish. Any help appreciated.
I found this branch in my sister’s yard, it didn’t have a smell until I stripped it of its bark. Now it has a woodsy peppermint smell to it. It was subtle (sorry not a good speller), when I started to sand it down the smell got stronger. It smells like earth, peppermint and something I can’t identify. Does anyone know what type of wood this might be?
I’m definitely no expert, but as an Australian, ‘peppermint’ rings the eucalyptus bell for me. Was the bark big thin shaggy pieces? Were there long, thin, dry leaves anywhere near it? Look up eucalyptus trees/gum trees and see if that seems plausible. It has a mentholated smell and the wood is pale like that.
Since you are in Minnesota it could be Virginia Mountain Mint or Wild Mint.
Hello, I just found a bundle of tropical hardwood flooring from a local restore. I’m having trouble pinning down exactly what it is. Colors of the boards range of brown to a much more red color. On the bottom they are marked “Perecchi”. The wood was very difficult to plane but produced a glossy finish with an almost reflective texture. The wood sinks in water, and some rough calculations put the density at about 900kg/m3. Shaving when placed in water lightly tinted it after a while, but seemed to produce much more tint in denatured alcohol. Freshly planed/cut wood fluoresces… Read more »
Looks like IPE
Araracanga
Does anyone know what type of wood this is
Hello. I have this wood. But do you know which tree this wood belongs to on the site? If you know, I would be very happy if you could help me.
It looks like my floor and that is French Oak, they told me.
Good morning, Eric! I really need your experience. About 30 years ago Japanese table tennis company used unknown wood to make blades. It has white/beige colour with dark stripes. Some people called this “planchonella”. But there are more than 100 types of this branch. Now we want to make a replica of this blade, but we need to identify this wood. If you have any idea, please, help. With deep respect.
Assuming that you’ve got the ID correct down to the genus Planchonella, this is a perfect example where reasoning and probabilities would be of much more practical use than the minutiae of wood ID. Because it’s quite difficult (in many cases, impossible with our current tools/knowledge) to ID wood down to a species level. What would be a more practical question is to attempt to find out where this company was located, if they had a habit of using local versus imported woods, and what woods might’ve been available at the time and place you mentioned. Keating and Bolza’s book… Read more »
I have a few old planks givin to me by a friends dad who used to do alot of wood working in Virginia. I have no idea if they are exotic or what. Could you help ID ?? They have markings on the side, chalk numbers and parts of production “stampings” indicating this wasn’t a piece of wood milled out of someone’s back yard. The planks were rough cut about the same, 7′ long, 1 5/8 thick, 7″~8″ wide. They are both fairly heavy hard wood. I have uploaded to Zip files with both planks. “A” and “B” they could… Read more »
I recently bought a used front door to install, and I’m trying to match the wood species for the sidelight panels. Any ideas on what it might be?
I’ve taken pictures in different lighting, both from the inside and outside. The door is stained, but the photos showing the side and top edges reveal freshly cut wood since I had to trim the door to fit. I suspect the vertical and horizontal wood might be different species, but I could be wrong.
Veneer doors but what type of wood vener are they? Oak, birch, both or something else?
Looks like oak to me. It’s a ring porous wood, so it’s not birch.
Pic 1 is not sanded. Pics 2-4 are finished with olive oil on a base I made. Don’t mind the router burn marks. This unidentified wood came from a large container of wood with various identified species from Laos where it was harvested. The sellers from Laos who are in direct contact with the harvester’s were clueless about this wood but thought it was good enough to add to the container. I saw there are over well over 200 species there. Any idea’s?
I narrowed it down by the amount of red colored woods in Laos but I still need help. It’s funny they cut a notch out of every piece to call it worked so it can be exported.
I have a table that my parents bought in 1973 in Virginia. They always called it wormwood but I know that’s not the type of wood. It’s been stained and I remember the original color being light. I’d like to know what it’s actually made of. I’m thinking pecky cypress or possibly even American Chestnut? Hope you can help!
I think Chestnut
Thank you Eric for providing such a comprehensive guide in how to ID wood. I have bought some offcuts which I am struggling to Identify but I think I lack the trained eye. The term unintelligible jumble is fitting :) These are my notes. Heart wood colour: Red, brown, purple hue (does not really show in the images) with yellowish streaks. Do not know if this is of any help, but it seems like the lighter coloured wood streaks are made up of a higher abundance of Parenchyma, see end grain image. Sapwood colour: Clearly demarcated yellow with gray hue… Read more »
I think brazilwood is a possibility, though it does seem to have quite a large amount of confluent parenchyma (and/or bands?) for brazilwood. I suspect it may just be something else, possibly more obscure. You didn’t mention your location, or where or how you got the wood. Knowing this would help narrow things down.
If you’re stuck on brazilwood, you could try mixing some shavings with water in a small vial and see if the extractives are readily leachable in water. Brazilwood would discolor the water pretty quickly.
Thanks for your reply and advice on the water test. Although the shavings look very similar to commercially sold brazilwood shavings for dye, the water does only discolour slightly to not at all, after soaking a long time, so it may be something else than Brazilwood. Having run out of ideas, I have ordered a backlight to get further clues. I will post more images once it arrives. Do you have any other advice? My location is Sweden, but these offcuts were bought from a daughter whose father had passed. He had other excotic woods such as panga panga, chanfuta,… Read more »
There’s always the chance that its a species that I’ve not yet added to the site. You might try keying out the parameters you have in NCSU’s InsideWood and try to sift through the multitudes of results… https://insidewood.lib.ncsu.edu/menu/type/MH?1
Thanks for the Link! I’ll see if I can make some sense out of this and post the species if successful.
Very straight grain, almost black/ lit ribbon veneer on chest
Dear Erick. These are a set of 3 tables that I intend to sell , but I don’t know how much to ask. Could you please help? Cheers. They are very heavy, I believe I found a date burned on the table that says 1994.
Hi all, thanks Eric for all your time and work. Ive here a fairly dense (id guess 700-1000kg/m3) log section, density is difficult as we have all layers of the tree, nullifying the water test. yellowish, greenish, brown heart. Yellow cream sapwood. A black layer between sapwood and bark (cambium??) Pictures of end grain, including all the layers. The outside of the log, but possibly not bark but what is immediately underneath. Also rough sawn side grain if at all useful. The smell is beautiful, my nose says ginger beer, my partner says vanilla nutmeg. Fruity spicy. Thanks, hopefully this… Read more »
What’s your general geographic region?
Thanks for taking the time Eric. I’m East Anglia, England. However, this was in a big joblot including everything from African blackwood, to snakewood to brazilian rosewood. The lady had no clue about any of it so I’ve a big lot of unidentified. This one was really stumping me though.
Hmm, I’m stumped too. It may be something less common, or something that was more common in decades past, but is now no longer in common trade. Nice looking stuff though.
Maybe it’s Guayubira /Guayaibi? Patagonula americana
Appreciate the idea. I’m now fairly sure it’s Mahuhu/Muhuhu or African Sandalwood. Just coming back in case this is useful to anyone else. Cheers.
Hello, this cabin was built in the ’80s and I’m trying to identify the type of wood that was used. Any help would be greatly appreciated. Thank you!
Great resource. Thanks for sharing your knowledge with everyone.
I’ve had this dresser for 5p years, bought at a curiosity store in the country. It’s a beautiful design. Any idea what it is?
thanks
That would be Ash if it is heavy like Oak.
Thanks for your comment. Do you mean “if it is heavy like oak” to be literally heavy as in weight?