
by Eric Meier
1. Not enough sanding
In my very earliest days of woodworking, I used to think that sanding through all the different grits of sandpaper was for anal-retentive chumps. “Nonsense,” I thought, “I’ll just use some 60 grit to get out the larger defects, and then some 220 to smooth things out.” As it turned out, I was the chump.
Differing grits of sandpaper are meant to save you time, not waste it.
If you’re just starting out, and you’re put off by the apparent large price of all those different grits of sandpaper, I’d highly recommend buying a variety pack that has a few sheets of each grit included. Then you’ll realize, especially if you value your time, that getting the right sandpaper definitely isn’t too expensive: it’s well worth it.
Basically, you are putting successively smaller and smaller scratches in the wood until, ultimately, the scratches become so small that they are “invisible” to the naked eye. So when you make coarse scratches in a wood surface—say, for instance, 60 or 80 grit—the fastest way to remove those scratches is with a medium grit: too large a grit (only slightly finer than the paper in your previous step), and you’ll be adding needless work; but too fine a grit, and you could sand for hours and still not remove the deep scratches.
Insufficient or poor sanding is a classic mistake common to a lot of beginning woodworkers. The wood is either given a quick, insufficient sanding; or else, if it is sanded to a finer grit, it is done haphazardly, and while skipping grits. The resulting surface my feel smooth to the touch, and may even look good from a distance with casual examination, but the proof is in the pudding, as they say.
Once a finish (and especially if a stain is applied) the sanding scratches will become all that much more noticeable and pronounced. You want to fix sanding mistakes before they’re embedded (and accented) under a few thousandths of an inch of pigments, dyes, and resins.
Learn how to inspect your sanding job between each grit
It’s not enough to just feel the wood or take a casual look and think “that’s probably good enough.” Sure, pros can sometimes get away with this lackadaisical approach because they have years of experience. But when you’re first starting out, anything that possibly can go wrong probably will go wrong: and nowhere is this more apparent than in the sanding.
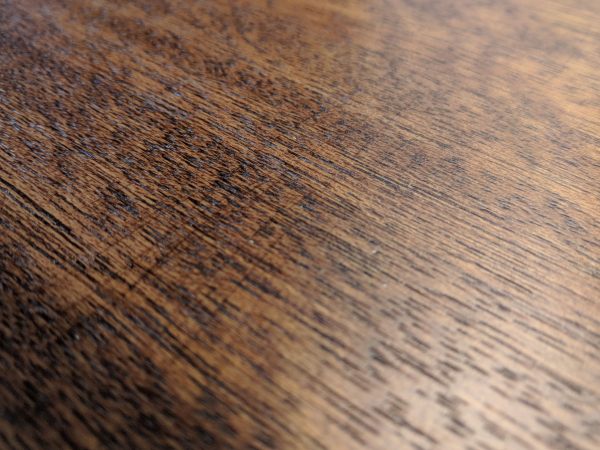
Nothing’s worse than going through all the grits only to find that you still have some 60 grit scratches left in the wood from the very first step. To check, wipe all the sanding dust from the surface of the wood—I like to use a microfiber towel that can “grab” the dust right out of the pores and scratches of the wood. A can of compressed air or an air compressor can also blow the dust out, but it also creates a cloud of dust in the air. Once the dust is out, hold the piece up to a light (or bring a light to the work-piece if it’s something larger), and view the surface at a very low angle—almost parallel with the surface—to try and spot any serious/errant scratches.

Use alternating sanding techniques to find where (and at what grit) you’re having problems
While it’s not always the best (or most efficient) method in all circumstances, using varying sanding techniques can be invaluable if it seems like you’re running into repetitive sanding flaws in your work, and you’re just not sure where they’re coming from. For example you could sand the first grit by hand, parallel to the wood grain, and then the second grit could be with a random orbit sander, and so forth. Just take care that sanding directly perpendicular to the grain by hand puts some serious scratches in the wood that will be very hard to get out with a finer grit—a better solution would be to sand at a slight left-hand or right-hand angle from the grain, and not to cut directly across the grain.
The success in using this trick is rooted in the simple premise that you should hopefully know the direction and shape of the scratches that you’re putting in the wood. Sanding by hand with a stiff backing block? You should see deep, straight scratches. Sanding with random orbit sander? You should see little tiny circular squiggles all over the surface. Sanding with a pneumatic/rotary sander? You should see broad, circular/arc patterns in the wood. By changing the pattern with each successive step, you’ll be able to tell by the direction and shape of the scratches where you went wrong. When you finish sanding and find a flaw, you’ll be able to say something like this: “Okay, I see there’s still some swirl marks in the wood, which are 100 grit scratches made with my random orbit sander; I followed that up with some 180 grit hand sanding that apparently didn’t get all of the previous sandpaper’s scratches out. I need to spend more time at 180 grit to ensure I remove all the 100 grit scratches.”
2. Using incompatible products
Oily tropical hardwoods can cause a lot of problems; essentially, the finish seems to stay wet and tacky indefinitely. This is due to the antioxidants present in the heartwood, which prevent the finish from properly curing (through oxidation). This article explains the problem as well as possible solutions in more detail.
Even if you are using a finish-friendly wood species, you may still have trouble when using a combination of two or more products that are incompatible with each other. In short, oil and water don’t mix! Try to use finish products that all use the same base solvent. If you absolutely must use some specialty product somewhere in the finishing process, a good rule of thumb is to try to use shellac as a peacemaker between two incompatible coats. The adage goes “shellac sticks to everything, and everything sticks to shellac.”
Lastly, in rare instances, steel wool can cause problems when used under water based finishes. Namely, the tiny particles of steel will rust when in contact with water. (Use bronze wool instead.)
3. Not enough coats of finish
Most people are looking for the fastest, easiest wood finish. This is a perfectly understandable impulse, but if you’ve put all that work into a project, it makes sense to finish strong.
The temptation is to only apply one coat and call it good enough. However, the quality and protection of most film building finishes (such as polyurethane, lacquer, and shellac) goes up exponentially on the first few coats (e.g., there’s a huge improvement in durability and moisture excluding effectiveness from coat #1 to coat #2, and another big jump from coat #2 up to coat #3.) After maybe 3-4 coats, the benefits of increasing film thickness diminish somewhat. See this article on wood finishes for more info on what finishes work best in certain situations.
One last tip that will increase the clarity of your wood finishes: when building up wood finish film thickness, use a glossy finish. Even if you want your final sheen to be satin or low-gloss, I recommend using high gloss on the initial coats whenever possible. This is because most satin finishes contain a flattening agent that dulls the surface of the finish, and can appear cloudy when built up in several layers. Instead, simply rub out your final finish layer (see tip #4) or apply a satin or low-gloss finish as the final coat of your finish.
4. No rubbing out
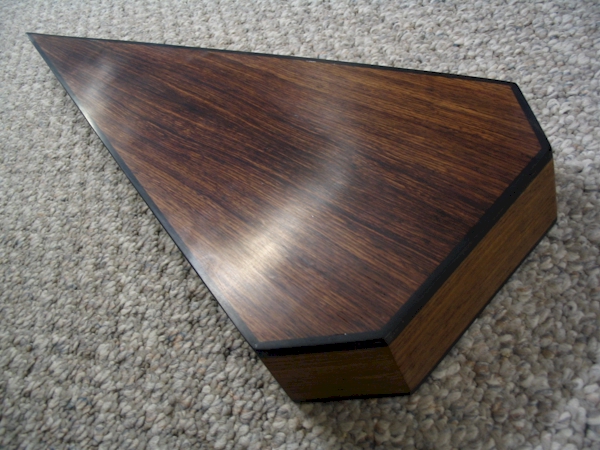
Most of the time, when advocates of only using a single thin finish film complain that thicker finishes look “plasticky,” it is usually because the finish was slopped on in several thick, drippy, gobbledy-gook coats (polyurethane is chief in this trespass). I would agree, such finishes do look like cheap plastic, but that isn’t solely due to the number of coats of the finish, but simply that the number of errors, defects, and unevenness in each coat accumulated without correction until you are left with one thick, bumpy, coat of clear plastic.
Consider this: many guitars are finished with ten or more coats of spray lacquer. Most of us would not say that the mirror-polish on guitars is plasticky at all. What’s the difference? After all those coats, the guitar’s finish was sanded level and then rubbed out.
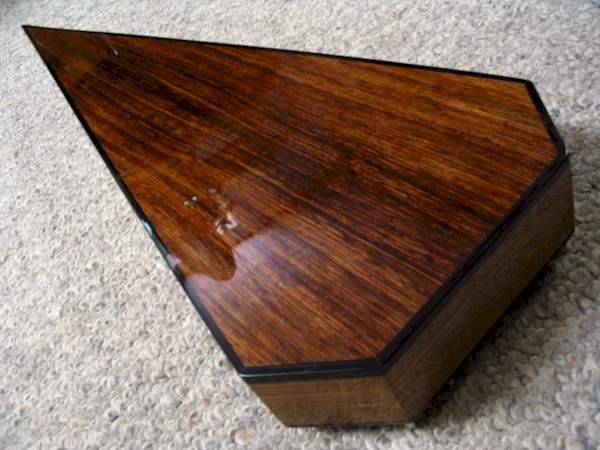
The art of rubbing out is perhaps too long to go into detail in an overview article like this. In a nutshell, a sufficiently thick film is applied to the wood surface and allowed to thoroughly harden over several weeks. Then, the finish is sanded flat and level (the thickness of the finish helps create a buffer so that the sandpaper will not actually cut through down to bare wood during this process).
Next, with a perfectly flat and uniform surface, the finish can be buffed up to whatever sheen is desired for the piece. (One additional mistake that can sometimes get overlooked is when no pore filler used, which means that on many porous woods, even with ten or more coats of finish, the pores still leave an uneven surface after leveling.)
For most beginning woodworkers, an easy way to get familiar with the process of rubbing out is to simply apply a few extra coats of wood finish to your project, and then sand it lightly with 400 grit sandpaper to remove all surface dust and irregularities. Then use #0000 very fine steel wool and rub the entire surface of the piece, this will leave a very pleasant and uniform satin finish that softly diffuses light.
Are you an aspiring wood nerd?
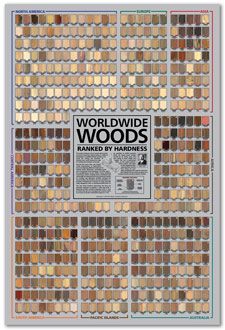 The poster, Worldwide Woods, Ranked by Hardness, should be required reading for anyone enrolled in the school of wood nerdery. I have amassed over 500 wood species on a single poster, arranged into eight major geographic regions, with each wood sorted and ranked according to its Janka hardness. Each wood has been meticulously documented and photographed, listed with its Janka hardness value (in lbf) and geographic and global hardness rankings. Consider this: the venerable Red Oak (Quercus rubra) sits at only #33 in North America and #278 worldwide for hardness! Aspiring wood nerds be advised: your syllabus may be calling for Worldwide Woods as part of your next assignment!
Previous post would not attached pictures
I really try to give the builders the benefit of the doubt whenever possible, but to be honest, the stain on these cabinets…. (Attempting restraint.) It could definitely be better. The streaks and visible brush strokes with stain absolutely should not be there–the only justification that I could think of would be if they were somehow going for a “distressed” look.
Hello Eric, I’m hoping you can help me. I’m having cabinets made in Puerto Vallarta and am not happy with how they are turning out. They are supposed to be parota (veneer) and I asked for a walnut stain. I wanted a dark color but to still see some of the grain that makes parota so beautiful. They are very flat in most areas with random spots that look like they don’t have enough stain. Also some areas that look like uneven brush strokes, not grain, and a few drips. I don’t know enough about parota or staining to know… Read more »